• Welcome back to Pokécharms! We've recently launched a new site and upgraded forums, so there may be a few teething issues as everything settles in. Please see our Relaunch FAQs for more information.

LoN's Signature School

Well, as I said in the previous thread. This'll guide you through installing GIMP, and then making something with it :p

Anyone can use this to help them, but the posters that I'm specifically helping in this thread are Kalseng, (Katie-Has bowed out, but is welcome to return), Rayn, Shiny, Aura and PR06, with Dani as an honoured latecomer :p

Also now helping Shado, Rain and XJirachiX.

Any other posters asking for help, I'm ignoring for now. These are the people who I'm helping as they expressed interest so quickly :)


To begin with, meet Wilber:

64px-The_GIMP_icon_-_gnome.svg.png


You'll be seeing him a lot from now onwards, so get to know him :) He likes bananas, or so I've heard.

Ok, let's get the installation sorted. For some people, this'll be easy, but for others not so. I could do this in five minutes or less, but I know others who could spend hours slaving over it :p

I'm assuming we're all on Windows here, if you're not, shout out now and I'll do my best to help you out shortly.

To download GIMP, click here: http://downloads.sourceforge.net/gimp-win/gimp-2.6.3-i686-setup.exe

Save the file to your desktop, and once it's downloaded install it to wherever you wish to. I put mine in my H:// drive, but I doubt you have that :p Keep in mind where you installed it!!!! (Important! :D)


Right... now, you -should- have a GIMP icon on your desktop or, if you chose not to have a shortcut, somewhere on your start menu. Don't open it yet! :D

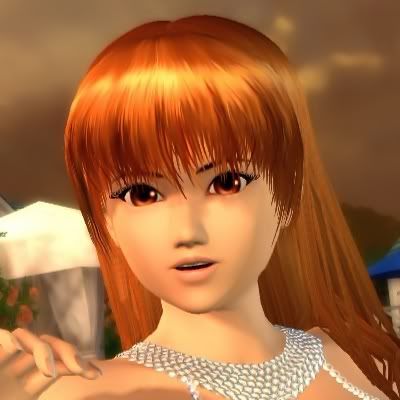
We have a few other things to get first. The first being an add-on called "GreyCStoration". Its an extremely powerful add-on that can transform an image's quality completely. Allow me to show you an example.

Before:
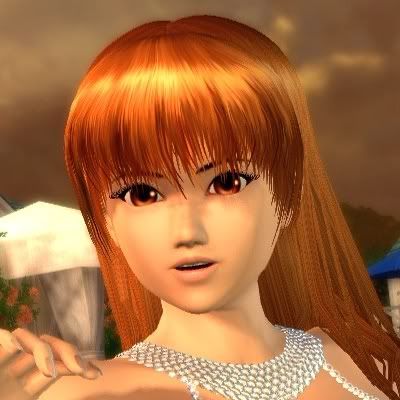
beforegreyc.jpg


After:

aftergreyc.jpg


The easiest place to see the difference is her hair, just to point that out.

Other demonstrations are here, just roll your mouse over the picture to see the difference:

http://cimg.sourceforge.net/greycstoration/img/res_fire.html

http://cimg.sourceforge.net/greycstoration/img/res_fingerprint.html

To download this plug-in, follow these steps:

Click here: http://sourceforge.net/project/downloading.php?group_id=96492&use_mirror=surfnet&filename=GREYCstoration-2.9.zip&11833054

Alternatively, click here: http://files.filefront.com/GREYCstoration+gimp+pc+wi2zip/;12690731;/fileinfo.html

Save the file to your desktop, and then once it has done double click on it. If you know how to, extract the file. If not, then do as follows: Look for a button on the top left called "Extract all", or similar. Click that then follow the onscreen instructions. Open your extracted file, then copy the file called "GREYCstoration_gimp_pc_win32" and paste it to this directory: "...\GIMP-2.0\lib\gimp\2.0\plug-ins". You'll need to remember where you installed GIMP, just like I said above. (Note: The second download link should only have that one file in it, the GREYCstoration_gimp_pc_win32 file.


The other thing we'll need from the internet is an assortment of brushes. From Paint, you'll know that you have a Square and a Circle Brush, of differing sizes. However, on more advanced programs such as GIMP or Photoshop, these brushes can be, prepare yourselves, any size, colour or shape. You can save a picture of yourself and use that as a brush if you so wish. These brushes are used in the same way as on paint, by painting colours or erasing to name a few functions, GIMP and Photoshop use them for much more.

The brushes we'll need are easily found on deviantART. (www.deviantart.com)

I'll pick out some that you probably will need, be it in beginning signatures or the later ones.

Download them by clicking on the download button, as shown here:
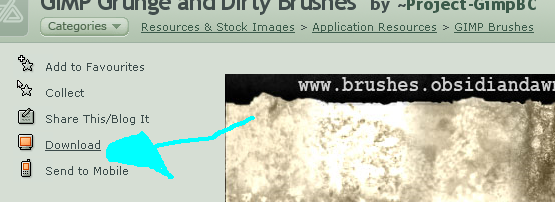
downloadbrushes.png


http://project-gimpbc.deviantart.com/art/GIMP-Grunge-and-Dirty-Brushes-70037228
http://abikk.deviantart.com/art/Abik-s-Splatter-Set-106297193
http://harryginnymustliveon.deviantart.com/art/Sparkle-Swirl-Brushes-105515131
http://project-gimpbc.deviantart.com/art/GIMP-Odysee-Brushes-62762572
http://insaneisenough.deviantart.com/art/Fractal-Brush-Set-1-27870855

If you want any more, bookmark/favourite this link for future reference:

http://browse.deviantart.com/resources/applications/gimpbrushes/?order=9

These brushes will come in a .zip folder, which you extract in the same way as you did the GreyCStoration. Copy these brushes to the folder: "...\GIMP-2.0\share\gimp\2.0\brushes"


*Note - From here, the screenshots are of an older version of GIMP, but they should give you a vague idea of what it should look like. For example, the newer GIMP has Wilber in Grey and Light Grey at the top of a "Toolbox" window.*


Finally, let's open GIMP and rearrange it to show you the functions that you'll need. The default GIMP will, or should, be a bunch of icons at the top dictating the different functions, with a nice empty space under the primary and secondary (black and white by default) colours. We can, however, allow GIMP to display many other things, such as what brush you're using, in this blank space.

Opening GIMP should bring you to a window like this: http://i180.photobucket.com/albums/x290/LoN_Colossus/gimp1.png

To start with, click the Eraser, the red/pink square shaped thingy highlighted in the screenshot above. A new window should open with the options that the Eraser has. However, you want to click between the "Eraser
 
Last edited by a moderator:
Thanks lon! Gimp is so much easier than MS Paint! Even though everything doesn't fit on the page, but oh well! And I dont know why, but mine looks like yours. Not like thiers. Hmm.. But anyways, I might be able to make my own sigs! Lol :D. The brushes rule! Thanks Lon!

Edit: How do you resize the image, and add transparency? Thanks!
 
but my GIMP looks different than yours. http://i356.photobucket.com/albums/oo8/Rayn_Shyu/gimpy.jpg
Did I download the wrong one or what? Or can I just work with this and hopefully be able to find everything okay? Or am I just stupid and unable to realize that it's the same?
Basically, I imagine that's a different version to mine. However, what you have looks to be all you need, at least from the screenshot you gave me there. If we do need something as we continue, we can update it. You might have to get your brushes again, or maybe not. We'll cross that bridge if we get there, when we get there.

You can check if it's a different version by going to Help->About. It'll say GIMP 2.0 or something in there, I run on GIMP 2.4.7.

[quote author=Rayn_Shyu link=topic=5266.msg83931#msg83931 date=1229555667]
Okay, I've basically downloaded everything... except for the splatter brushes because my computer couldn't find them...
[/quote]If you have some spare time, you aught to search for some yourself, on that final brushes link I gave you. They'll come in handy later on, but not right now.

[quote author:pokemon_Ranger06 link=topic=5266.msg83935#msg83935 date=1229559348]
I downloaded everything, but not the paint brushes, because my computer couldn't find them neither.
[/quote]What do you mean when "Couldn't find them"? (Applying to Rayn too)

[quote author:pokemon_Ranger06 link=topic=5266.msg83935#msg83935 date=1229559348]
I also had trouble with this download because, when I tried to open it, it took me to media player, and it couldn't play it for some reason.
http://sourceforge.net/project/downloading.php?group_id=96492&use_mirror=surfnet&filename=GREYCstoration-2.9.zip&11833054[/quote]Right, ok. I'll upload just the file you need to my FileFront, and we'll see if that works.

http://files.filefront.com/GREYCstoration+gimp+pc+wi2zip/;12690731;/fileinfo.html

Try that one there, it'll just have the one file you need, so you won't have to go through finding the file, but you still need to follow as it says here:[quote author=LoN_Colossus link=topic=5266.msg83920#msg83920 date=1229548108]
Save the file to your desktop, and then once it has done double click on it. If you know how to, extract the file. If not, then do as follows: Look for a button on the top left called "Extract all", or similar. Click that then follow the onscreen instructions. Open your extracted file, then copy the file called "GREYCstoration_gimp_pc_win32" and paste it to this directory: "...\GIMP-2.0\lib\gimp\2.0\plug-ins". You'll need to remember where you installed GIMP, just like I said above.
[/quote]

[quote author=XJirachiX link=topic=5266.msg83946#msg83946 date=1229566653]
Edit: How do you resize the image, and add transparency? Thanks!
[/quote]If you read the top, I'm only helping these people specifically! However, if you actually be patient, I'm going through all this soon, never fear :p And seeing as you caught up so quickly, good job. It's nice to know my instructions hit home 100% to someone without any errors!


Edit: Woohoo! LoN epic failed! :'(

I've now updated my GIMP... :p ... and now I'm gonna correct the above instructions.


Edit 2: Updated the instructions, the flaw was in the changing of GIMP's layout. The rest will work fine.

[quote author=LoN_Colossus link=topic=5266.msg83920#msg83920 date=1229548108]
*Note - From here, the screenshots are of an older version of GIMP, but they should give you a vague idea of what it should look like. For example, the newer GIMP has Wilber in Grey and Light Grey at the top of a "Toolbox" window.*


Finally, let's open GIMP and rearrange it to show you the functions that you'll need. The default GIMP will, or should, be a bunch of icons at the top dictating the different functions, with a nice empty space under the primary and secondary (black and white by default) colours. We can, however, allow GIMP to display many other things, such as what brush you're using, in this blank space.

Opening GIMP should bring you to a window like this: http://i180.photobucket.com/albums/x290/LoN_Colossus/gimp1.png

To start with, click the Eraser, the red/pink square shaped thingy highlighted in the screenshot above. A new window should open with the options that the Eraser has. However, you want to click between the "Eraser   
 
Last edited by a moderator:
Hi LoN, I did something, idk what and now I cant click the stuff under the tools. How can I put it back? I'm talking about the "Dockable Dialogs". Please help mehh please.
 
Well I did that and it's the wrong thing. You know when you click the brush there are brushes under it? Well I can't click on the different brushes. That part is gone. It is for each tool. How can I put that back?

Edit:Oh I found it, took a while though.
 
Any other posters asking for help, I'm ignoring for now. These are the people who I'm helping as they expressed interest so quickly :)
So, PLEASE take some time to actually read posts Jirach-whatever your name is now... ::)

Hopefully come this evening, I'll get a basic tutorial up for signatures.
 
Oh by the paint brushes I mean every time I click on the file it takes me to media player again, and it says it can't play it or something like that.
Sorry I am not good at computers, so I may have trouble at times
I downloaded this link but it took me to media player again, I tried to extract the file, but it is already unzipped.
http://sourceforge.net/project/downloading.php?group_id=96492&use_mirror=surfnet&filename=GREYCstoration-2.9.zip&11833054
Sorry about the trouble, but I need help please.
 
Could you take a print screen of this media player thing and host it on tinypic or something...

IE, press the print screen button on your keyboard, paste it into paint or whatever. Then go to www.tinypic.com and host it. Should be straight forward.
 
Assuming this can be double posted in here, seeing as its new content in the artworks forum by the topic creator... If not, I guess I'll edit it to my previous post.

[quote author=Teh Rulez]Art/Writing topics may also be double/triple/whatever posted by the artist/author to post new material - but ONLY by the topic's creator.[/quote]


Well then. Let's cut to the chase and make your first signature. I'll be using my first signature as a guide, so we'll see how this works out :)

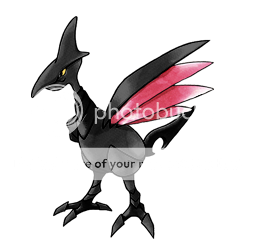
For starters, you'll need to find an image that's called a render. Renders are images that have a transparent background, such as this one:

blackskarmory2.png


If you want a pokémon related Render, go to this site (Signing up not required): http://gallery.gtsplus.net/ ...they don't ask for the images, but follow their simple rule. It's not hard: [quote author=GTSPlus.net]You are permitted to use images in this gallery without giving credit (although credit is still appreciated), though you are not permitted to claim any of the edited or scanned work in this gallery as yours.[/quote]

Make sure to pick from the images under "Art & Images [Image Count: X]", the ones under "Large Images - Click for fullsize image [Image Count: X]" aren't transparent!

If you want something else, check out these sites:

http://planetrenders.net/renders/index.php
http://www.premiumrenders.com/gallery/

You may or may not need an account, I can't remember seeing as I've signed up to both anyway.


Once you have your render, open GIMP.

To get the render in GIMP, you have several options. One being, find the image in your desktop or files and right click, then click open with GIMP. This is how I do it (If GIMP isn't already open, it'll open with your image in a new window, hence why I do it. It's easy). You can also go File->Open and find it that way.

Next, you want a new image (You don't want to make your signature over the top of your render after all :p). The way to do this is File->New. Pick the size of your signature you wish, the one I'm using here is 420 width by 90 height (420x90). Signatures usually range from about 450x150 to as small as you want. I'm now using 395x125. (For those making lots of the same size, you can change the default image size and settings in "Edit->Preferences->Default Image"). Make sure that under advanced options, you picked to fill it with what you wish to use. Any can work, I've used all 4 options.

Pick out some of those brushes you downloaded, and brush around with black or white (If you had a white BG, or transparent use Black. If Black, use White.). Then brush with the other colour until you have a nice background coming along.

After this, go to Colors->Colorize. Adjust the Hue, Saturation and Lightness until you have a colour that matches a colour from the render you're planning on using (at least a little, mine isn't the exact blue but it doesn't matter that much.)

Mine came out like so:

firstsig1.png


Next, you want to paste your render in lots and lots of times, so it fills the page. Do this like so. Make a new layer on your signature window. Select your render window, and then go Select->All. You should see a moving black/white line going round your selection. Next, Edit->Copy. Then swap over to your signature, and go Edit->Paste, then click New Layer. This will post the entire render as a new layer on your signature image. You might need to scale the render down, if so, go to Layer->Scale Layer. Enter the size you want (Note, the little chain link means that if you change one number, GIMP will change the other number so that the image does not become distorted. If you want to change both numbers yourself, click on the link so that it becomes broken. This disables this action.) and then click scale. Now, you will need to move your render around. (You might not want to scale the render, its up to you.) Now, you'll need to blur this render. The best way to blur an image is to go to Filters->Blur->Gaussian Blur. This is by far and away the best way to blur an image. Blur it by about 8-14, then set this layer as overlay. This'll change the colours on your first image using the blurred render image.

I got this before overlaying:

firstsig2.png


And this after overlaying:

firstsig3.png


Next, paste in your render and scale it down. Stick it where you want it with the move tool (Looks like 4 arrows, make sure that "Move active layer is checked in the tool options dock.) and click on the anchor in the layers dock.

I'm at this now:

firstsig4.png


Next, duplicate your render layer. You can do this by clicking the double picture frame button on the layers dialog, between the down arrow and the anchor button. After that, gaussian blur it by about 9, and set this layer to overlay. What this does its emphasise the render's dark and light areas, and make the colours more obvious.

I'm at this stage now:

firstsig5.png


Next, you want to add text. Click on the big A at the top to open the text tool. Click where you want, and write what you wish. I just used my name, and you probably will only use a name for a long time. I coloured mine a blue colour to go with the signature, and then I added an outline to it. The way to add an outline to your text is to, right click on the text layer in the layers dialog and click "Alpha to Selection" (You'll notice the black/white line around the text, just like when you selected the render.). Next, go to Edit->Stroke Selection. I'd recommend using a couple of pixels border.

I got this:

firstsig6.png


Finally, you want to add a border. If you want to know why, compare these two images and decide which is better:

firstsig6.png


firstsig7.png


To add a border, open a new layer and use the rectangle select tool (A rectangle icon believe it or not :p) to select your entire outline of your signature (You get used to this after a while ;)) and then add a 1 px Border just like you did with the text. Edit->Stroke Selection with a 1px line in black. Make sure its black!

You can do it in a much easier method, using techniques I've said in this lesson. See if you can work it out, my homework for you ;)

And you're done, hopefully! :D

firstsig7.png


Phew, won't get the next one up for some time. It'll be more complex so I want you guys to get used to the basics first. Without a doubt it'll be after Christmas, possibly as late as the new year.

Post your outcomes, try and best my first! :D Don't forget the homework! It's a few paragraph/lines/whatevers up.
 
Last edited by a moderator:
Well, I have to say that it was really fun. And surprisingly fast. I decided to do a Feraligatr one...
fergy.png

I think I have an idea of how to do borders easier, but I think I need to poke around more. And I want different fonts...​
 
Great outcome! One piece of feedback I'll give is that I'd say, blur your render layer a bit more. His spines are quite easily noticeable, but that's not a major problem.

Good job for your first! :D


Aha, forgot fonts. Will add that to the main post soon.

Simple really, you'll need to go to a website like www.dafont.com or www.1001fonts.com and download one you like :)

Extract the files like I mentioned earlier, and then you'll need to copy them to your control panel -> fonts folder. Not sure about Vista, don't have it. Will have to look into it. (Note, this'll install the font on your PC so you can use it in Word and such like as well as GIMP, you don't find a folder in GIMP to keep your fonts :D)

If in doubt for which files to copy, copy them all. :p
 
Meh.

I was GOING to do what you did, but then I found a cool thingy.

ANYWAY.

Here's what I did.

KnucklesSignatureAttempt.png


I'll do it over with a Knuckles on the top layer later.

EDIT:

Yeah, I lied. I did the following instead.

AlphonseSig.png


It's for Belle, so I thought I'd put it here on display.
 
Yay for fonts! And I figured out how to do the border... but I'm not gonna tell. Here goes Feraligatr siggy two!
fegi.png

I did a filter on the background, Clothify I think. Then instead of overlay I did hue for the "blurry" layer. I likes it.​
 
I wanted to learn how you make sigs too! But you locked the forum. And I was doing other thing so I couldnt message you. Well I tried to make one. This was my outcome...

Scizsig.png


Accidently got a brown outline when I was writing text.
 
Meh.

I was GOING to do what you did, but then I found a cool thingy.

ANYWAY.

Here's what I did.

[image]

I'll do it over with a Knuckles on the top layer later.
Looks like you found your problem there, Knuckles on the top would have been better.

[quote author=Kalseng link=topic=5266.msg84157#msg84157 date=1229811211]
EDIT:

Yeah, I lied.  I did the following instead.

[image]

It's for Belle, so I thought I'd put it here on display.
[/quote]I definitely think this one is much better than the other one, great job![quote author=Rayn_Shyu link=topic=5266.msg84168#msg84168 date=1229829153]
Yay for fonts! And I figured out how to do the border... but I'm not gonna tell. Here goes Feraligatr siggy two!
[image]
I did a filter on the background, Clothify I think. Then instead of overlay I did hue for the "blurry" layer. I likes it.​
[/quote]Nice outcome there Rayn, my only problem with it would be the size though :-\ It's a bit.... big :p

When you're spraying around with the sparks brush like that, try going back and erasing over the sparks that cover Feraligatr. It'll give the image some depth.

[quote author=XJirachiX link=topic=5266.msg84172#msg84172 date=1229830723]
[image]

Accidently got a brown outline when I was writing text.
[/quote]Why didn't you go back and remove it? :p

Not bad for a first one, try to have a mixture of the primary colour and the secondary, some more white might do that one some good.


Here's another example of the above tutorial, but I didn't follow it exactly (A good thing, sometimes you need to add your personal touch, right?)

basicsignatureexample2.png
 
murlock.png

Go go Murlocs. Tried to get something kinda grungy on this one and... yeah. The second Feraligatr one is huge, tried to get a decent size with this one.​
 
Jirachi - Another good outcome for your first, try to add a border in future though. It makes the image a whole lot neater.

Also, try to use the secondary colour from the render you chose somewhere as well. In this case, I'd have used the colour of the horn in the text.


And something I forgot about GTSPlus.

Make sure to pick from the images under "Art & Images [Image Count: X]", the ones under "Large Images - Click for fullsize image [Image Count: X]" aren't transparent!
 
Oops sorry for double post. And I cant pick the colours with colour picker.

Edit: Nevermind I got it, I used Blisseys colors for this one. I really love it! I call it... Smilee;)

Smilee.png


Edit: Dang I can't get any new fonts since I have a Windows Vista comp :|
 
*groans* I go away for 3 DAYS and everyone's already started... Oh well, 6 weeks to do it! I'll download everything tomorrow. Thanks in advance Lon, for this!
 
Okay I did that. Btw. You think I'm getting good with sigs. I made 2 more.

Gardeviorpoof.png

I followed your tutorial for this one. For the first time. XP

rosebandits.png

This one has a plaid background lol.

Okay bye.
 
Well, after finally getting it and some help, here is my first, using the black Skarmory LoN colored for me :p


Then I did Houndoom, just cause :p I like Skarmory way better.

 
I've incountered a problem... I can't find the "GIMP-2.0\lib\gimp\2.0\plug-ins" which I have to save the extracted files to. I think I must have missed something...
 
Well, here's one with Flygon. I think it's a bit big... bah, what ever, it's the first one with Flygon I like.
flygon.png

This one I mostly played around with blurs and junk.
...Because they're both cool...
kinskar.png

And because I wanted to get the whole Death Knight on her steed, this one's big. I wouldn't put it in a sig, but it looks cool... and I like it.
salzerra.png
 
I've incountered a problem... I can't find the "GIMP-2.0\lib\gimp\2.0\plug-ins" which I have to save the extracted files to. I think I must have missed something...
You'll need to find where you installed GIMP first, and the rest -should- be in there.
 
Top